My neighbor just got a bunch of really nice landscaping done on the side of her house that I can’t see. The other night, she brought me over to show me all the basil and mint and thyme and wonderfulness that she had put in. It’s not all edible, but most of it is.
Anyway, she said, “take all the basil you want!” referring to a holy basil bush that was roughly the size of a kitchen table. I said that I would because I was seeing my mom for brunch the next day and she loves holy basil. Well, apparently, mom has enough of it, too.
This morning, I got a text that neighbor had left some on the back porch. I replied that I looked forward to turning it into pesto.
That bottom board is 14″x11″.
After 136 years of picking leaves off stems, I ended up filling the 2 qt. Pampered Chef mixing bowl.
Lotsa basil!
I cleaned up a bit and assessed the pesto ingredient needs, pulling the lemon juice, pine nuts, and parm out of the fridge. I decided to use EVOO instead of another fancy oil. I popped three garlic cloves off the head and peeled them.
Since the food processor will be busy making swift work of the basil and pine nuts, it’s best if you use the smaller side of the cheese grater for the parm.
Unfortunately, I don’t have any action shots because I was mostly worried about how I was going to get all of this pesto made without it taking another 136 years.
I scooped two loose handfuls into the Hamilton Beach 8 Cup Food Processor, sprinkled some lemon juice, tossed in a garlic clove, poured in about 1/8th of a cup of pine nuts, and did a swoosh of oil. These steps were repeated three times until I ran out of basil and did one last spin with salt and pepper added.
Tame and perfect.
I haven’t made pesto in a long time, and don’t care at all for the jarred variety (it’s too oily and salty). This turned out, if I may say so, perfect.
Cubes for freezing.
Added bonus: it was exactly enough to fill one of my silicone ice cube trays.
Before I cleaned off the cutting boards, I harvested enough basil seeds to plant next year with our bucket tomatoes.
This is based primarily on a recipe from America’s Test Kitchen’s Make-Ahead Cookbook, which my mom gifted me for Christmas one year. It’s full of wonderful ideas for preparing dinner, lunch, and dinner and ways to get more meals out of your shopping list. It also gives ideas for freezer meals and slow cooker meals (good ideas for summertime—save the delicious Wisconsin sweet corn and don’t turn on the oven).
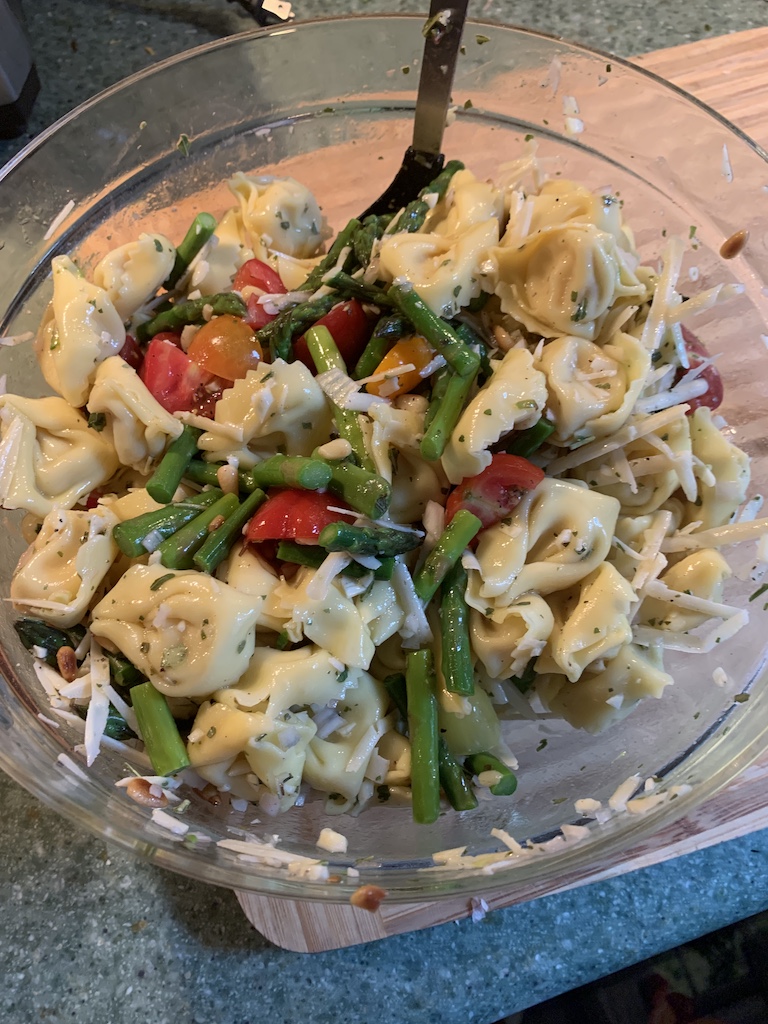
This is a fairly simple put-together dish; the only thing that gives it a second eggplant is that you need to blanch the asparagus. The bonus here is that you use the same water to boil the asparagus as the tortellini!
Speaking of, it’s time to start the water boiling. Whoever discovered heat+water=cooked food should be lauded for their curiosity and intuition.
With asparagus, I usually do the bend-til-it-breaks trick, but this time I decided to simply cut enough off the bottom, letting the knife tell me where the woody part starts. I think I didn’t want to be disappointed in how much I paid for it (this veggie is usually priced per pound), and I already have two baggies of ends in the freezer waiting for me to decide to make cream of asparagus soup.
Cut into roughly 1-inch pieces.
When the water bubbles, pop the greens in and set a timer for two minutes. Grab your trusty stainless steel bowl and put in some ice cubes; then, I usually keep the bowl in the freezer until the last second.
When the timer says so (in my case, it’s Alexa beepity-beeping at me), pull the bowl, fill mostly with cold water, and start slotted-spooning the asparagus into it to stop the cooking process. Let the pot on the stove come back to a boil.
Now it’s dressing time. I’ve mentioned before that making your own dressing is cheaper, better, and faster than buying bottled, and there’s no HFCS hiding at the top of the list, or Yellow #5 and Maltodextrin hiding at the bottom.
The dressing contains a delicious amount of minced shallot and garlic.
I’ve long known I’m never going to be a vampire. I like garlic way too much for that noise.
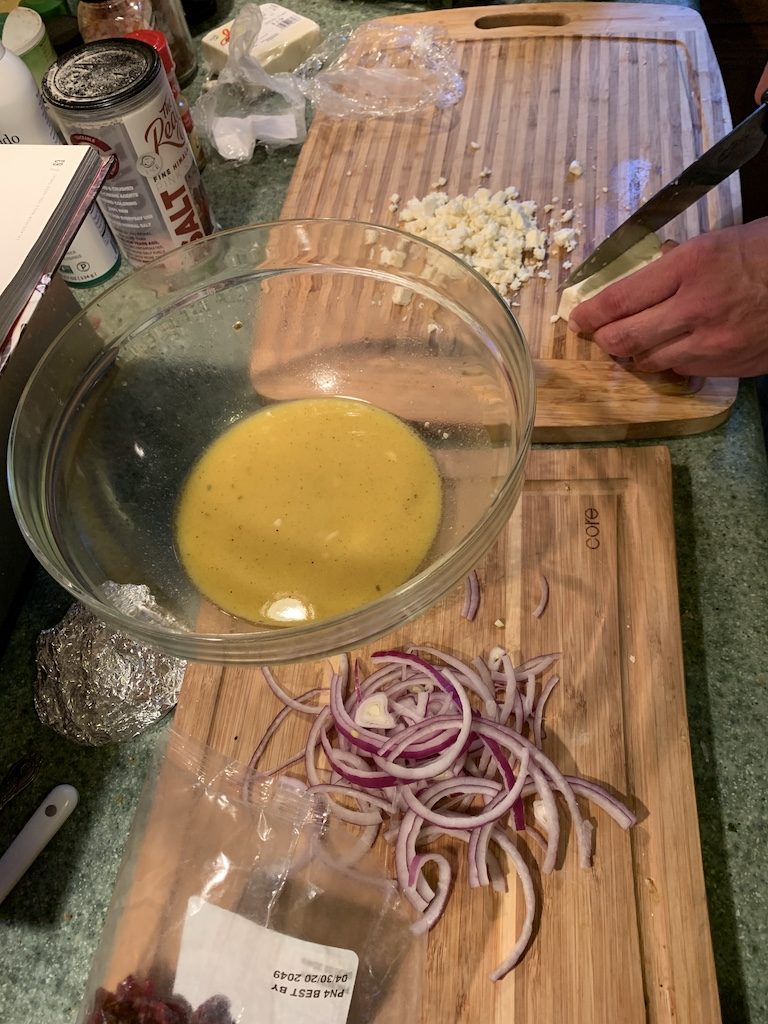
In a two-cup bowl, I squirt some lemon juice and realize I’ve run out, so I finish off the acidic liquid with some white wine vinegar. Because I’ve opted to use Lighthouse Farms freeze-dried Italian spices (do not buy this from Amazon, it’s too expensive—I’m sure your local Penzey’s store has a suitable alternative), I pour it in to let it rehydrate for a minute, then add the alliums. Whisk in the olive oil and let sit until everything else is assembled.
This is the magic sauce.
Slice up enough cherry tomatoes and put the asparagus into a medium bowl and add salt and pepper.
The multi-colored tomatoes make this dish pop.
To add a little bit of smooth crunch (I get the opposition, but pine nuts do that), roast a handful of pine nuts.
Since the tortellini is “fresh” (from Costco), it only takes about two minutes to boil (did I mention this dish comes together so quickly it’s almost silly?) so it’s the last thing to cook.
While it’s boiling, grate some parm and try to contain yourself.
Strain the pasta and rinse with cold water so it doesn’t melt the Parmesan. Pour into the bowl, add the dressing and shredded cheese. Stir carefully so as not to break the little pockets of cheesy amazingness.
Bring a large pot of water to a boil. Add asparagus bits to boiling water with a little salt.
Prepare blanching vessel with ice cubes and cold water. After two minutes, remove asparagus from the pot with a slotted spoon into the ice-cold water. Strain and set aside. Return pot to a boil.
Stir together lemon juice, vinegar, and herb mix, then add diced garlic and shallots. Whisk in the olive oil and let rest.
Heat a small pan over medium and toast pine nuts until slightly darker than raw.
Slice tomatoes. Grate Parmesan.
Add tortellini to boiling water. After two minutes, straing and rinse with cold water.
This is from Chrissy’s Cravings, which I’ve talked about before; it’s the “lightest” recipe we’ve made from the cookbook (there may be others, we don’t know yet). We’ve made this twice so far and it comes together really quickly because you get to use the roasting and cooling time to do all the other prep and then it seems like you didn’t have to wait for anything!
Break up a head of cauliflower and roast, boil water, cook feta, make the dressing, mix together in a bowl. I know that sounds easy, and I do tend to think that making food is easier than it really is, so I’ll go through it more thoroughly.
Broken up, ready to roast.
The cauli gets tossed in some olive oil, salt, pepper, and minced garlic and roasted; then set aside to cool.
The best picture of orzo cooking that you ever did see.
The orzo gets boiled, rinsed, and oiled; then set aside to cool.
It’s coming together!
Meanwhile, the dressing gets whisked, feta crumbled, and onions cut.
Toasted pine nuts for crunch.
Since I have a huge bag of pine nuts from Costco (it’s the best deal), I like to throw them in salads when I can; toasting gives a nice flavor.
Brick feta.
I like using the brick feta because it’s cheaper per ounce, and there aren’t as many preservatives as in the tubs of pre-crumbled feta. Plus, it’s not that hard to slice and crumble.
Mosty toasty roasty.
When the cauli is cool (it always is!), and you’re ready to assemble, throw everything in the bowl, along with a handful of dried cranberries (Chrissy recommends cherries, but I don’t have those) and fresh spinach.
Serve and eat immediately before I take your plate. Surprisingly, this holds up for lunch the next day without getting too wilty.
Now, go get Cravings (amzn affiliate link) so that I can afford her next book, Hungry for More!
Full disclosure: I’ve never been to New Orleans and my only litmus test for a good po’ boy is Bab’s brief stint on Willy St. (where Ha Long Bay currently resides) and New Orleans’ Takeout.
Last night, however, I think I made the best catfish po’ boys this side of Lake Pontchartrain; let’s see how I did it!
Cabbage, carrot slaw with added red onion and pepperoncinis.
I started four hours before dinnertime with a 10 oz. bag of Josie’s Organics Power Mix and added red onion and pickled pepperoncinis.
Next comes about three tablespoons of mayo, some Dijon, lemon juice, white wine vinegar, minced garlic, onion powder, sweet paprika, and a little Tony Chachere’s creole seasoning.
Mayo and vinegar slaw; the best of both worlds.
Mix all this together and put it in an airtight, leakproof container because you’re going to be flipping and flopping it around to get everything good and coated. Store in the fridge until you’re ready to put the sandwiches together.
Next up, the remoulade. I didn’t take pictures because it’s simply mayo, paprika, Louisiana hot sauce, and some more Chachere’s. Mix all this together and store in the fridge until assembly time.
When you can’t stand waiting any longer for that delicious slaw, turn the oven on and get your parchment paper out! Three fillets were one-half fillet too much for our huge sandwiches, so plan accordingly. These were frozen, but it seems they take about the same amount to bake… roughly 10-12 minutes. I sprayed ’em with avocado oil and seasoned them with some more Chachere’s and placed them in a 400° oven.
Fishy, fishy, fishy, fish.
I sliced the French bread loaf and scooped out some of the dough. Who needs that to take up space when you have all this other deliciousness?
A nice French bread will do.
When there are around three minutes left on your oven timer, pop the bread in to warm up.
Now it’s all about assembly: bread, cheese, tomato, slaw, fish, remoulade, bread. And a side of mildly dirty rice.
This is a highly-modified version of the black beans that Braulio used to make for Mickey’s brunch when he had time. Being the frugal Mexican that he is, he would use dried beans, soaked overnight, and twice-cooked them; his were also vegan. I use canned beans and chicken broth. Those are the biggest differences between his and mine.
I don’t have a long, drawn out post to make about these. But, I do miss my friend since he moved to Beloit to help take care of his mother-in-law.
Beans sharing the spotlight with a bunch of other good eats.Huevos Rancheros featuring these delicious beans.
Almost Braulio’s Black Beans
The tastiest black beans that I know how to make. Use them as a side with breakfast eggs, inside a burrito, or by themselves for lunch. I won't judge.


Recent Comments