I don’t really care for sweets, but every morning, I have a Nature Valley Dark Chocolate Cherry Granola Bar with my one cup of coffee. It breaks the fast and isn’t bad for me. I’ve shopped around to try to find a suitable organic brand alternative, but they’re expensive to try them all and that makes it hard to switch.
Well, now that I’m a Pampered Chef (independent) consultant, I get to try out all the products I would like! So, when I got the Snack Bar Maker Set recently, I set out to replicate those granola bars that had their grips in me for so long.
Let’s just say there will be a certain amount of trial and error, but I got something (22 somethings) that I will enjoy until I get to try another batch!
I had Joolies already, because I use one in my smoothie every (weekday) morning. I suppose you could use other kinds of dates (are there other kinds?). The goal here is to sweeten without using sugar.
I popped the dates, (homemade) almond butter, coconut oil, agave, salt, and a cup of oats into my kick-ass Blender and puréed everything together. It had to work a little harder than I think it wanted to, so that’s a consideration I need to make with the next batch. I’ll probably use fewer dates since I’m adding other sweet things later.
Pure puréed goodness.
I cleaned out the blender and got to work mixing in the chia seeds, chocolate chips, dried cherries, and muesli.
“Whole” mix-ins.
It looked pretty good at this point! Since I needed to clear the counter to make focaccia dough, I scraped the ingredients into the bar pan and tossed it into the freezer. Incidentally, this filled the silicone tray of exactly 12 bars.
Barbarbarbarbarbarbarbarbarbarbarbar.
After 15 minutes in the freezer, I took them out and they were way too squidgy for me. Bendy. Loose. Not granola bar-like.
I scooped them all back into the bowl and added almost all of the rest of the bag of Bob’s Muesli. Mind you, at this point, I’m mentally calculating how much these suckers are going to cost, and how long it’s going to take to amortize the savings. But, can one really put a price on healthy, non-preservative-filled choices?
I filled the tray again, and this time, left them in the freezer overnight. This was mostly due to not wanting to be in the kitchen anymore, but also because there wasn’t any reason to not do this.
The next morning, I was pleased with the results! I could eject them out of the tray easily, and placed them between waxed paper pieces, and since I had so much more “dough”, I was able to fill nearly an entire second tray.
One dozen dozing bars.
I have enough for nearly a month now and, while they might still cost more per unit, they’re not GMO and I know precisely what’s in them. They’re a teensy-bit sweeter than I would like, so I think I can leave out the cherries (or replace them with raisins) once I run out of those, which will bring the cost down significantly. I’ll probably also cut the number of dates in half and increase the nut butter and coconut oil a smidge.
I was on a vegan cookbook kick for a while, amassing all sorts of reference material for the one week that I tried being completely vegan (you can’t eat out *at all* unless you know the chef). It wasn’t difficult as long as I didn’t try to substitute anything for cheese. People try to tell you (themselves, really) that cheese substitutes are a sufficient facsimile, and they’re just not. The only thing that comes reasonably close is Minimalist Baker’s Vegan Parm. I still use this instead of that jarred parm that isn’t even mostly cheese, to begin with.
ANYHOOOOO, along the way somewhere, I started making these overnight oats for my weekly morning snack and I’ve been making it since that vegan trial week in May 2016.
I’m not a fan of the green banan.
Grab yourself a banana, peel, halve, sprinkle with cinnamon and smash.
This recipe (three servings) fits neatly in a 3-cup Glasslock container. Do yourself a favor and get a whole set.
Using my trusty Pampered Chef Measure-All, I slide it to the 1-cup mark and pour in the oats.
Then, I slide it to 1/4-cup and measure the chia seeds.
Ch-ch-ch-chia.
I get nervous Every. Single. Time. that I’m going to knock it over and chia seeds will be everywhere in the kitchen for 100 years. Those go in, and I flip the Measure-All over and pour in 1 1/2-cups of almond milk. I didn’t get a shot of this cuz… boring.
Stir it up. Come on now, stir it up.
Mix it all together and put your snap-tight lid on and leave it in the fridge overnight. In the morning, you’ll need to give it a good stir.
Settled oats.
Then, I top it with frozen blues from Costco. The ones that fall on the floor become dog treats, but you knew that already.
Then I pack as much as I can into a jar and continue on with the rest of my snacks.
This is a highly-modified version of the black beans that Braulio used to make for Mickey’s brunch when he had time. Being the frugal Mexican that he is, he would use dried beans, soaked overnight, and twice-cooked them; his were also vegan. I use canned beans and chicken broth. Those are the biggest differences between his and mine.
I don’t have a long, drawn out post to make about these. But, I do miss my friend since he moved to Beloit to help take care of his mother-in-law.
Beans sharing the spotlight with a bunch of other good eats.Huevos Rancheros featuring these delicious beans.
Almost Braulio’s Black Beans
The tastiest black beans that I know how to make. Use them as a side with breakfast eggs, inside a burrito, or by themselves for lunch. I won't judge.
We’d been having migas each weekend day for breakfast for a while, so I thought we could mix it up for the long weekend (also, I had only thought to buy two poblanos instead of three).
I scoured the blueprint of the fridge in my brain to come up with suitable ingredients, wishing there was a button with which to dispense asparagus. Alas, this is not Star Trek, so I landed on a simple tomato-basil mix as the featured stars.
I whipped up a quick crust and pressed it into a Pyrex pie pan.
Don’t worry! If it looks rough, I call it ‘rustic’.
Chop up the tomatoes (these are from Costco) and sprinkle with basil (I threw in some Italian seasoning, too) and salt. Right about now is when I would remember that I should have turned the oven on to 400°.
Tomatoes and basil smell so good.
Place the tomatoes on the crust and crack four eggs into the bowl (don’t bother rinsing it out, it’s all going to end up in the same place) and whisk with a fork or, the fella’s favorite, a French whisk.
Pretty little tomatoes.Eggs and cheese.
Mix the shredded Asiago into the eggs and pour over the tomatoes in the pie pan. Top with a few sliced tomatoes to make it look nice.
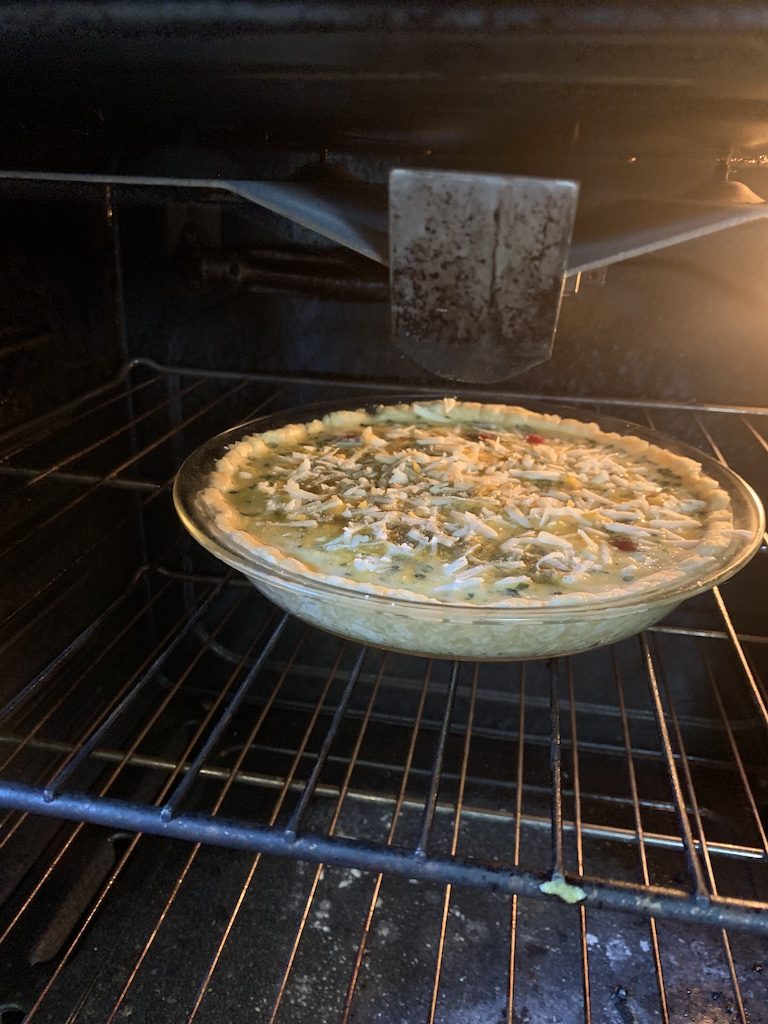
It even looks good raw!Into the oven.
Throw it in the oven for 30 minutes. When the timer beeps, grab a wooden toothpick and poke it into the middle of the egg. If it comes out clean(ish), it’s done enough to take out (it will keep cooking a little while it rests). Leave it on the counter for five minutes and then slice and serve!
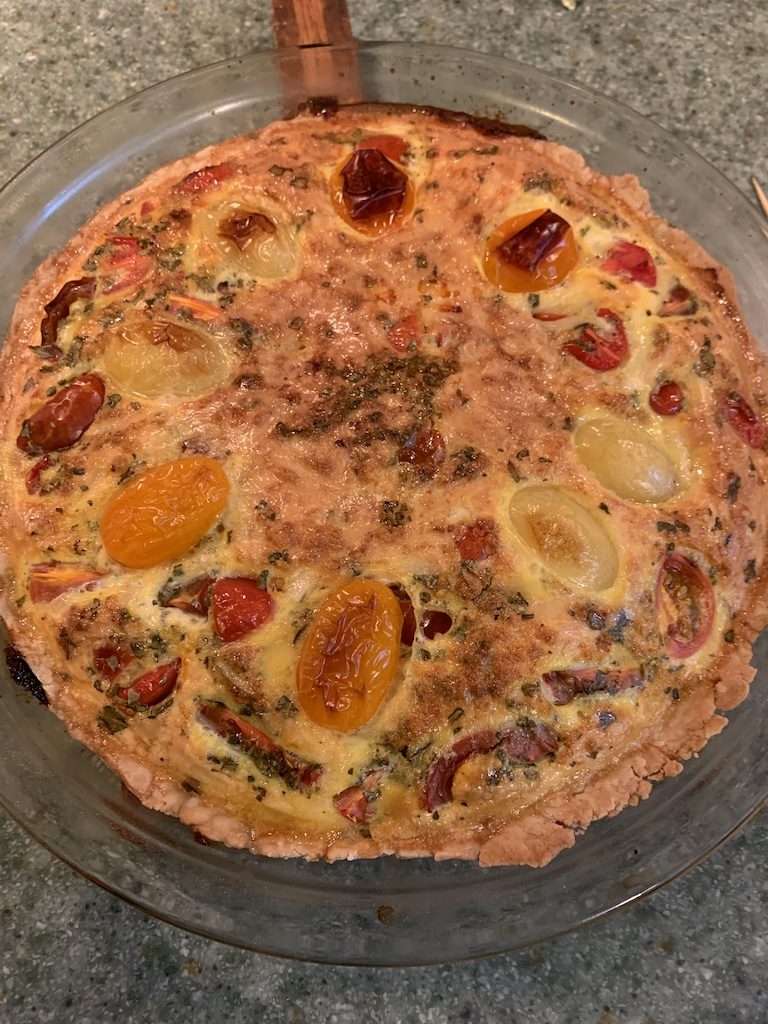
Easy, cheesy, quichey.
Mary Berry would have been proud that there was no soggy bottom, but I didn’t press it into the pan evenly enough, so it was thicker in the corners. It will come out and taste just as well without the crust if you want to skip that part. That would qualify this as a one-eggplant recipe, then.
Tomato-Basil-Asiago Quiche
This is a quick, throw-together for breakfast or lunch. It takes mere minutes to prepare and you can use any compatible ingredients that you have hanging out in the fridge.
Whisk together oil and water to thicken a bit and pour into dry ingredients.
Mix with a fork until well combined, use your fingers to spread the crust into an ungreased 9" pie plate.
For the quiche:
Preheat oven to 400°.
Clean out the bowl from making the crust and put the chopped tomatoes in there. Mix well with basil and salt. Spread them as evenly as you can over the crust.
Beat the eggs in the same bowl. When sufficiently mixed up, add the cheese and pour gently over the tomatoes and crust. Top with some halved tomatoes for looks.
Bake for 30 minutes. Test the middle with a wooden toothpick, and if it comes out mostly clean, it's ready. Let rest for about 5 minutes, slice and serve.
Breakfast is the most important meal of the day. Though, for me, that only applies to weekends and leisurely days off work. As a result, we take our end-of -fast pretty seriously in this house.
The fella is really good at cooking scrambled eggs. We’ve spent the better part of last winter trying to perfect a replicate of the breakfast burrito at Mickey’s Tavern (do yourself a favor and go have brunch on the patio at least once; if you’re lucky, it will be a life-changing experience), and made up a cheesy egg sandwich that will probably get a post on here in the future. But, a couple of weekends ago, I suggested we try migas because they’re simply divine. And delicious. And really pretty easy to make if you’ve got the egg part down.
The first place to start is roasting a poblano pepper over medium heat on your gas stove (you did stipulate that a gas stove was a house-having requirement, right?) until most of the outer skin is charred. I think this takes five to ten minutes per side but it kinda depends on the pepper and your patience. After it’s roasted, you need to put it in a bag (I prefer paper but plastic can also be used) to sweat for about ten minutes; I usually take this opportunity to chop up and start cooking the onion.
Speaking of the onion, here’s a cool trick that I learned from the front section of Cook’s Illustrated where readers send in tips to share. Dice the onion; whatever amount you think you like, start your pan over medium heat, and drizzle the lubricant into the pan (I use EVOO or propellant-free Avocado Oil) and place a single piece of onion into some of the oil while the pan is still coldish.
The onion stands alone.
Now, while you’re dealing with the pepper, the tell-tale piece of onion will heat up with the pan and bubble and sizzle, giving you aural indication that the pan is ready. Genius!
When the pan says, “Go!”, throw in the rest of your chopped allium and give it a swirl with your favorite wooden spoon (also a topic for another post) so that each piece gets shiny. Sprinkle on about a teaspoon of cumin (authoring recipes will be difficult for me; I don’t measure spices. Ever.) and give it another stir. Let the onions hang out and get a little softer, for about five minutes.
Once the peppers are sufficiently steamed, they’re ready for “processing”. Some folks say you should scrape the charred bits off with the edge of a spoon or the dull side of a knife blade, but I find that arduous and think running warmish water over the pepper gets it ready more quickly (did I mention patience up there?). Compost the seeds, veins, and stem. Slice the pepper longways and chop to a similar size as the onion bits.
A roasted and skinned poblano.
Throw your diced pepper into the pan with the onion and give it a good mix-around and leave on the heat until everything is warmed up (I regret that I do not have a picture of this particular step).
In your 2 qt. mixing bowl (this Pampered Chef set is amazing) and with your real fancy French whisk, you want to put some air into five large eggs. In other words, take fifty good whacks at the eggs or until they seem to be fluffy enough.
Add the eggs to the pan and … The fella invokes some wizardry at this point, which I’m not quite privy to because I usually find something that needs to be put away or gotten out of the fridge at the EXACT MOMENT the eggs are one minute from being done.
An eggy masterpiece waiting to happen.
When the eggs look like they are *just about* to set, crumble, rip, and squish up two corn tortillas and add them to the pan along with two handfuls (a heaping cup) of shredded “Mexican blend” cheese. The rate of speed by which these two new ingredients are included should be negotiated between the adder and the egger because stirring and adding should be simultaneous. If it’s just you, then this conversation will be brief.
It’s really hard to photograph eggs in a visually pleasing manner.
When the cheese is sufficiently melted, it’s time to serve! Dish up more than you think you want because this is amazing. Slice up avocado on the side and nosh with your favorite breakfast beverage.
Sunday morning at the breakfast nook.
Migas
This is a Norwegian gal’s Tex-Mex version of a traditional Spanish breakfast dish (or for whenever really).
Roast the poblano over medium heat until charred. Place into a bag to sweat it for 10 minutes. Peel, using your favorite method. Slice and chop.
While pepper is sweating, chop up the onion and start a pan over medium heat. Sauté the onion until just soft and add the diced peppers.
In a small bowl, whisk the eggs until fluffy. When the peppers and onions are hot, add eggs and slowly mix together; scraping the eggs from the sides and bottom of the pan, using a folding-stir method.
When eggs look nearly set, add the crumbled tortillas and 1 cup of the cheese and continue folding to mix everything together.
Put the rest of the grated cheese on top and throw a lid on the pan for about 3 minutes.


Recent Comments