While this is nearly the same as the Coconut Curry Whitefish post, I didn’t feel like I should simply make an addendum to that one because the chicken requires more prep and cook time, which means it gets an extra eggplant on the easy-rating scale.
Plus, I added a can of diced tomatoes. And chopped cauliflower. And green beans. Okay, so it’s not nearly the same at all. Hence the new post!
That’s all onion, curry paste, and oil.
When the onion is sufficiently soft (remember, it’s going to cook for another 35-45 minutes, so it’ll get softer), add the coconut milk and mix it up (I had to add this separately because, well, the milk had separated).
Stir in the tomatoes, veggies, turmeric, chicken broth, agave nectar, and red pepper flakes.
Marvel for a moment at how very easy it is to make a curry broth with veggies (cuz it’s about to get a little weird).
Remove the skin from the chicken and save them for chicken-skin chicharrónes (which you’ll hear about eventually because I made them for the first time the next day after making this and they were amaaaazing).
Naked chicken thighs look pretty strange.
Lay the bird pieces on top of the liquid and pop a lid on it. Set a timer for 35 minutes and take a shower, walk the dogs, watch an episode and a half of The Office, or do whatever you do. When the chicken temps at 165°, it’s ready to enjoy!
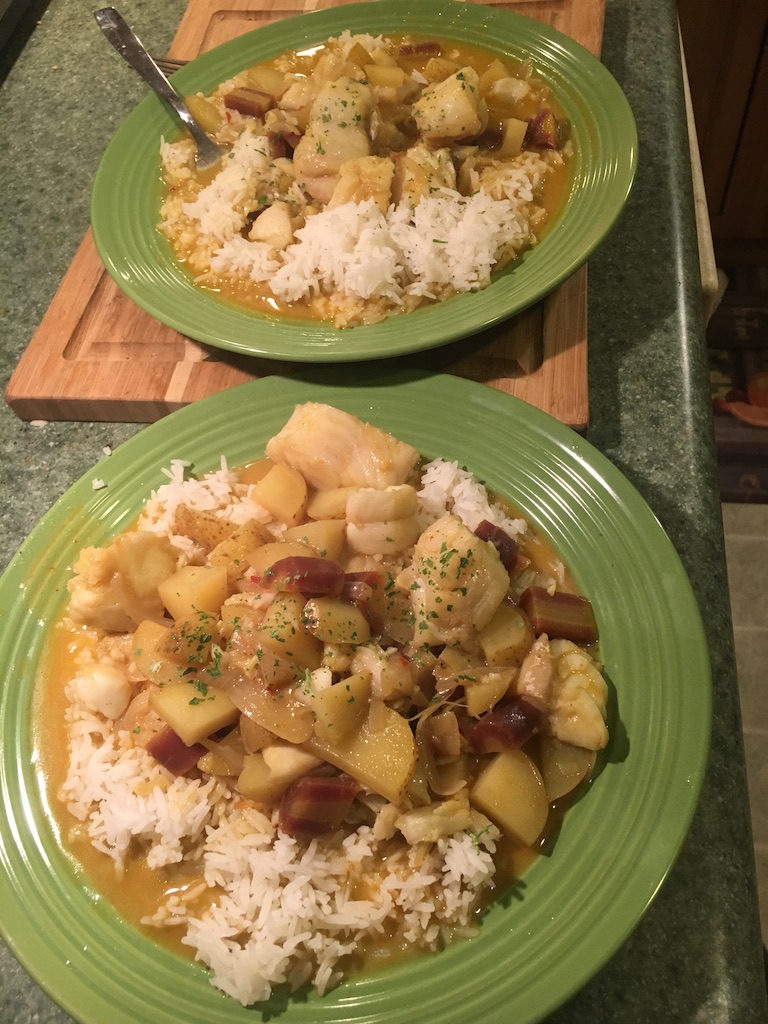
Pop some rice in a bowl and, using a non-slotted spoon, scoop some veggies and yummy broth onto the plate. Top with a chicken thigh. Enjoy the steam.
Steamy goodness. Sorry if this animation is a little twitchy.
You will have plenty leftover and it reheats really well. Make your coworkers jelly by bring this to lunch the next day!
Coconut Curry Chicken
This uses a basic coconut curry sauce in which to cook the chicken.
I have an indescribable infatuation with Gina Homolka and her SkinnyTaste cookbooks (and blog). Well, maybe it is describable and I will attempt to do so here.
I own three of her four cookbooks and they all sport a billion post-it flags. This is indicative of the recipes I want to make after the initial run-through when I procure a new cookbook.
I may save time flagging the ones I *don’t* want to make.
This recipe isn’t on her website, so I will IMPLORE you to buy the book, SkinnyTaste Fast & Slow, to get the actual recipe, but her Sea Scallops, Arugula, and Beets is a close approximation that will get you most of the way there.
The best part about the recipe that isn’t in that one ^ is the beets get spiralized and they bake in 15 minutes. 15-minute beets. Can you imagine?
Using your favorite mechanism to spiralize (mine is linked in the “verb” back there), get a couple of beets (one gold and one red makes for a prettier dish), and spiralize the crap out of them.
Two spiralized beets take up a half a sheet pan.
Salt, pepper, and 15 minutes in a 425° oven results in perfectly roasted, toasty, tasty beets.
Post-roast.
Meanwhile, make the dressing, which consists of some orange juice (from a real, live orange), white balsamic vinegar (if you have never used this in a dressing, treat yo’ self), and olive oil. Plus Himalayan pink sea salt and ground peppercorns, but since those go in just about everything, it’s mostly without saying.
Real fruit juice makes for a better dressin’.
Toss your favorite greens with the dressing and plate, and grind some more pepper on there for good measure.
Let’s turn our attention to the scallops now. You’ll be happy to know that they take next to no time to cook but need some prep beforehand. So much prep that I didn’t even know about it until researching for this post.
If you buy the frozen scallops (as I do), The Splendid Table recommends soaking them for 30 minutes before drying for 10.
All lined up, like the oysters in the Walrus and the Carpenter.
This next part is funny because Gina’s whole premise is “skinny but still tasty”, which it totally is, but her portion sizes are a lot smaller than mine and I don’t measure vinegar, fat, citrus juice, or salt. So, the recipe calls for 1 tsp. butter. ONE TEASPOON of BUTTER. I said, out loud to no one, “Who uses one teaspoon? I mean, I’m not Paula Deen or anything, but come on!” and put roughly half a tablespoon in the pan with some olive oil because Gina knows what she’s doing.
Oil and buttah.
The pan should be super hot because the scallops need to sear, not cook, and they only need 30 to 90 seconds per side.
Near perfection. Have I said that before?
After the scallops look like that ^, then they are ready to plate.
You don’t have to get each ingredient in every bite, but every bite will be worth it if you do. Enjoy! And go buy all of Gina’s books.
We put this on the weekly dinner list (more on that later) and I was a little apprehensive because, well, fish. Thankfully, this dish hits on all points and the real star here is the curried broth.
I modified the recipe from Christopher Kimball’s Milk Street and feel like I made enough changes to warrant publishing this version as my own. But, buy the book, because it has a lot of yummy dishes.
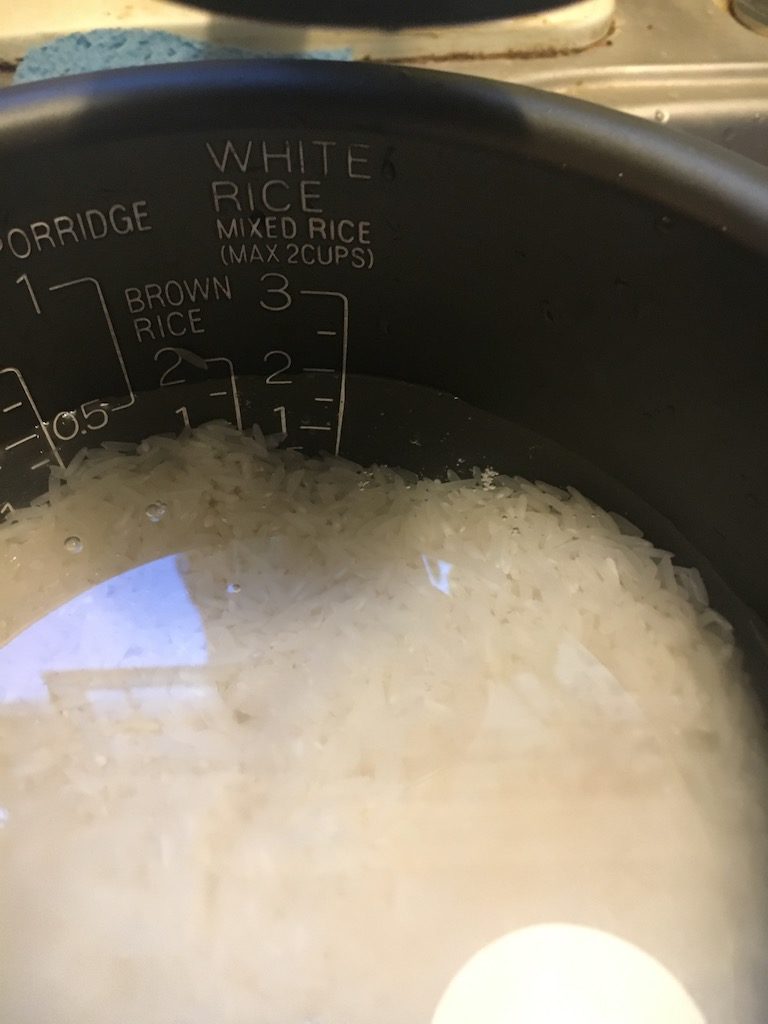
The first thing to do is bust out the ol’ rice cooker and measure up some jasmine rice.
Measuring cup and bowl.
It’s really important to use the cup that came with the cooker and not use any other device. This cup is “calibrated”, if you will, to the size and type of rice cooker. If you were to dump a cup of rice from this guy into a regular 1-cup, you’d see what I’m talking about.
After the rice is in the bowl, it needs to be rinsed. Admittedly, I haven’t found much of a difference in the end result. Except when I make rice for the dogs and it hasn’t been rinsed, it’s more difficult to get out of the container.
I don’t use a colander. Instead, I rinse it in the bowl and pour the water out. This needs to happen at least three times, if not more. I don’t look for very clear water at this step, just clear-enough water.
The first rinse.
When the rice is sufficiently cleansed, the cooker does all the rest. Believe me when I tell you that I cannot make rice without this rice cooker. If I try to make it on the stove, I lift the lid out of impatience or it’s got too much water to rice, or it all sticks to the bottom.
Fill the bowl, with water or broth, to the line that corresponds to the number of cups of rice you’ve measured. I am pretty sure this is where the magic happens and some rice-cooking faeries are watching from inside of the cooker, waiting for the opportunity to heat up each individual grain.
Ret-to-go.
Best of all, it plays “Twinkle, Twinkle, Little Star” when it starts cooking.
Most white rice will take 30-40 minutes and the display will let you know when the 10-minute countdown begins. Jasmine is particularly fragrant (it kinda smells like popcorn when it’s nearly done), so your nose may notice before the countdown starts.
The next part involves a bunch of chopped vegetables and I didn’t get pictures of them because I’m not used to stopping and capturing the process yet.
Heat a 3-quart dutch oven or another vessel over medium heat and add about a tablespoon of coconut oil. When that’s melted, add the yellow curry paste and stir in the carrots, onions, garlic, turmeric, red pepper flakes, and coconut milk.
All we had were purple carrots.
While this gets all saucy, prepare the cod (you remembered to take it out of the freezer two days ago, right?); cut into chunks and season with white pepper and salt.
May ye rest in pepper.
When you can’t stand just smelling this anymore, put the cod into the pot and stir, making sure everything gets nicely mixed in. Add more chicken broth if you want it saucier.
A designated cutting board for raw meats is a grand idea.
Give it sevenish minutes and poke on of the pieces with a fork. If it responds like someone that consistently stands you up (flakey!) then dinner is served.
This is another easy dish that we tend to reserve for (Taco) Tuesdays.
Frozen, unpeeled shrimp is the way to go. Grab a 1 lb. bag the next time you’re at the market; this will be enough for two with some shrimp leftover. Or for seconds.
Thaw the shrimp in a colander and bowl under cold, running water for about 10 to 15 minutes; I have the fella peel the shrimp because this process makes my fingers itchy.
You or a loved one can use the time during the shrimp defrost to shred cheese, chop onions, dice tomatoes, and chop lettuce.
I can’t remember where I learned this onion-dicing trick, but I wish I could thank whoever taught me. I happened to have half an onion (the butt end) hanging around in the crisper drawer for this tutorial. Slice the onion all the way through and set one quarter on its side. Slice that piece in a series of cuts that sort of radiate around the outside, not slicing all the way through the butt (this part is keeping the bulb held in one piece).
Radiant onion.
Once the onion is sliced longways, you can start chopping shortways (I don’t know how I decided which was which), and this will result in some nicely-sized diced onion! Remember to keep your knuckles sticking out further than your digits; you’re less likely to chop something off this way.
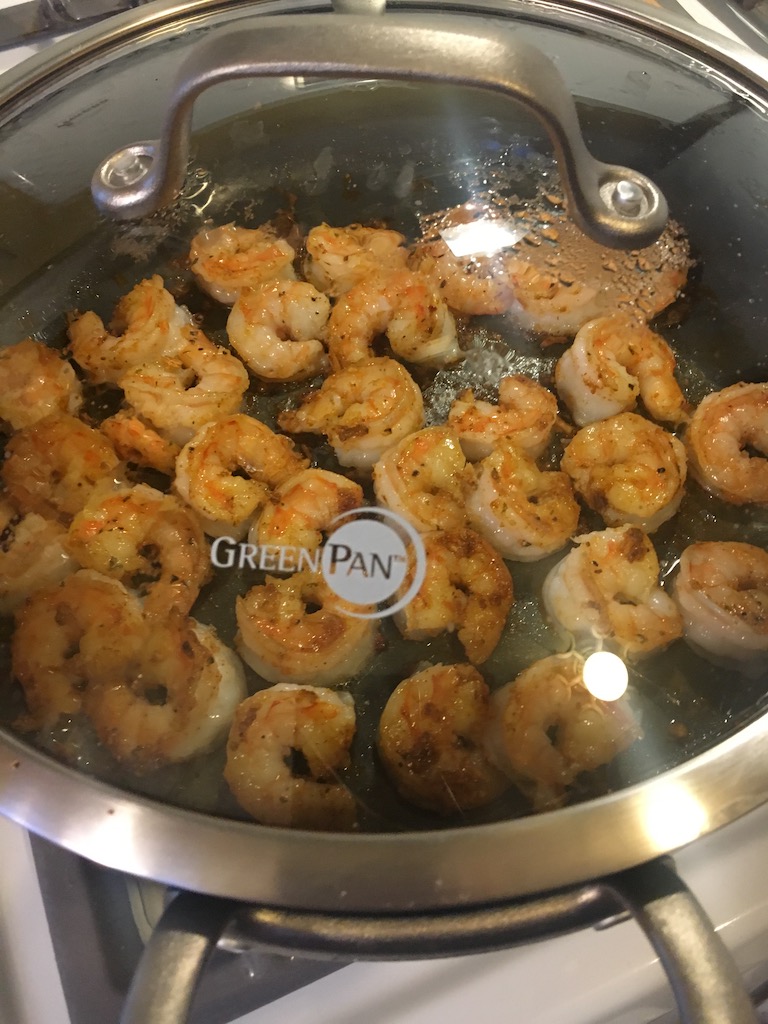
Warm up a pan over medium and add some oil, then sprinkle in your favorite taco seasoning. When the pan is hot, lay all your shrimps on one side, sprinkle with some more seasoning, and cook until you see them get pink and curl a little; about 4 minutes.
Hot pan with taco seasoning.Shrimpers, side one.Little shrimps, dancing in the pan.
Flip each and cook on the second side for about 4 minutes.
Happy shrimps!
Once they’re sufficiently pinkened, I usually cover the pan and turn the heat all the way down while I toast the tortillas using the remaining three burners. Stay close by because they have a tendency to catch (at least for me because I sometimes leave the room or even the house after getting impatient with one side or the other).
This isn’t really a trick, but I don’t know what you don’t know, so I’ll share. Slice the tomato into quarters and use your fingers to scoop out the seeds and goo out so you can just dice the parts worth eating.
Tomato, deseeded and degooed.Prepped toppings make assembly a breeze.
Plate your tortillas, top with favorites, and chow down.
Half of us like Cholula.The other half prefers this à la veggie.
I usually like green salsas but have been pouring away at this jar of Dashelito’s Sweet Potato Hot Sauce that I found hiding in the cupboard.
Defrost shrimp in a colander under running cold water. Peel and remove the tails.
Heat pan over medium, spray or drizzle with oil. Sprinkle half the amount of taco seasoning in the pan and distribute shrimp evenly. Cook for 4 minutes on each side.
Chop up your toppings and have at the ready.
Turn the other three burners on low to medium and heat up the tortillas.
I started this blog with the intention of sharing recipes that I really like from cookbooks that I have but there are rules about sharing methods since they belong to the author of said recipe.
You can find the ingredients and instructions on a bunch of other people’s sites or in Yotam Ottolenghi’s book Plenty More.
I’ll share with you my experience and pictures and hope that you want to make this yourself.
THIS DISH IS AMAZING, relatively easy, and pretty.
Firstly, Ottolenghi doesn’t tell you to salt the diced eggplant and I have the secret as to why. Female eggplants have more seeds, so the fruit is more bitter (more seeds means a higher likelihood of creating more fruit babies). Salting it draws out the bitterness but it also makes it squishy. If you learn how to select the right eggplant, you can save yourself time and have a tastier dish. It’s also fun to stand in the produce section looking at the bottom of each eggplant while others gaze on, wondering what the heck you’re doing.
The eggplant takes about eight minutes to cook up, use this time to dice the carrots and celery.
Not bitter, male eggplant.
Take the eggplant out of the pan and swap in the celery and carrots.
In a little bit, you’ll look at the list of ingredients and, if you’re anything like me, you’ll say, “Who uses ONE teaspoon of tomato paste?!”
Here’s a trick I employ when tomato paste is involved since I have never come across a recipe that uses an entire 6 oz. can.
Freeze it!
Get yourself some silicone trays and fill ’em up! Pop them in the freezer and, when you remember, put them in a freezer baggie for the next time you need one more teaspoon.
After the broth and paste are mixed in with the onion, garlic, veggies, and orzo, stir in the cheeses. The recipe calls for cubed mozzarella to be placed throughout the mixture, but we’ve found that this doesn’t distribute well, so we recommend shredding the cheese and mixing it in.
Fill up your favorite casserole dish and top with the sliced tomatoes.
Pre-bake.Post-bake.
The end result was so delicious that I only remembered to grab a picture of my second helping.
For the full recipe, use The Googles, or buy/borrow/lease Ottolenghi’s book Plenty More.
We made these for dinner last night and when I woke up this morning, I said to the fella, “I have to post these next because The Peopleneed to know.”
We’ve been using the organic ground turkey* from Costco for these and I’ve found that defrosting the meat in the microwave gives it a different consistency that I don’t really care for. So, we have to plan ahead and defrost in the fridge, or make ’em fresh after purchase.
*I’m sad to report that the turkey from Costsco is Butterball brand.
Get out your favorite medium-sized bowl and crack the egg. Using the shell halves to separate the yolk from the white, let the white fall into the bowl and do whatever you want with the yolk (I compost it with the shell, but we’re toying with the idea of using the whole egg next time).
We used the whole egg in this version.
Whip the crap out of the albumen so it gets air bubbles. Sprinkle in your garlic and parsley (I will confess here, that I use McCormick Minced Garlic and Lighthouse Parsley because they are super-convenient). Add to the bowl some chopped-up white onion and diced-up pepperoncinis (these can be mild or hotish, so know your audience).
Throw the hunk of raw, ground turkey into the bowl and start to incorporate everything with your hands. Doing this is kinda squishy, so you and your cookin’ partner will have to Rochambeau over the task. The person whose hands are the cleanest gets to pour in the panko crumbs. I haven’t used regular ol’ bread crumbs, but if that’s all you have at hand, give it a try!
Pre-panko.Raw meat never looked so good.
After the panko is mixed in, make a slow-motion karate chop through the center of your bowl and eyeball two halves. Get the panko-pourer (i.e., the person with clean digits) to lay out two pieces of waxed paper. The patties will hang out here until the pan is ready.
Yes, it will be messy.Patty perfection!
Heat up a drizzle of oil over medium and start the oven (to warm up the buns—skip this part if you’d rather). When the pan is heated, carry your patties over and plop ’em upside down. These are big burgers, and they take about 10 minutes per side, so this is a good time to get your condiments out of the fridge and prepare your toppings.
That is an 11.25″ pan.
After 10 minutes, peek at the bottom. When they’re sufficiently browned, give ’em a flip.
B-side down.
We recently found the best buns for these burgers; they can handle the heft and don’t get soggy while you’re eating. Throw them in the oven to toast for about 5 minutes.
Into the oven for a warm-up.
A secondary attribute of these that I like is that the list of ingredients is as short as it should be.
These are the absolute best.
This is when having a digital meat thermometer is really handy. Find the thickest part and slide the business end of the thermometer in halfway. If it doesn’t read at least 165°, don’t touch ’em. If it’s close (160°-close), top with cheese and cover for 3 to 5 minutes.
Cheesy melty goodness yum.
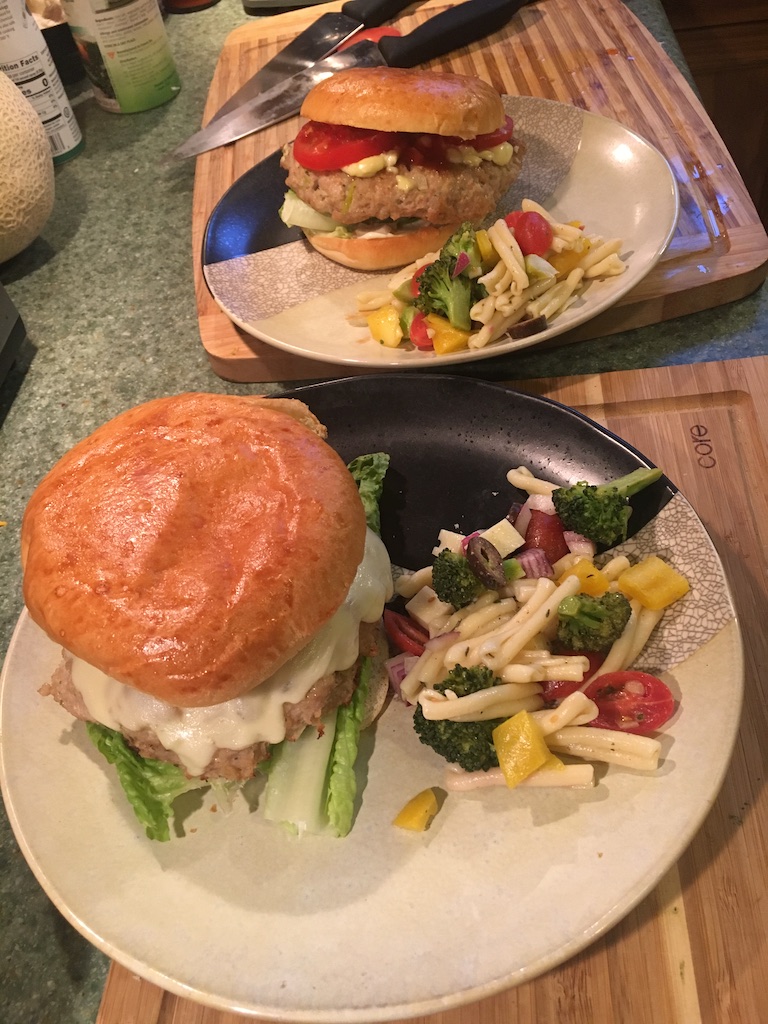
We load ’em up with mayo, mustard, lettuce, tomato, and raw onion; but since it’s your face, you can put whatever you like on them. Sometimes we have a side, like pasta salad or putt-putts (the posts for both of which are on my list), but sometimes the nearly 1/2 lb. burger is just enough.
With Italian pasta salad (post coming soon).Simple burger with melted cheddar.Turkey burgers flying solo. Get it?


Recent Comments